

Speaking of which…
Step 9: Get rid of any mobile apps and browser extensions you don’t need
While you’re thinking about third-party add-ons for your computer and phone, take a moment to review everything you have installed on both fronts and consider how many of those programs you actually still use. The fewer cracked windows you allow on your Google account, the better — and if you aren’t even using something, there’s no reason to keep it connected.
And with that, we’re ready for our final two parts of account-protecting possibilities.
Part III: Plan for the worst
Step 10: Set up or confirm your virtual Google will
Thinking about worst-case scenarios is never particularly pleasant — I’d much rather be eating crumpets, myself — but just as it’s important to have a plan in place for your physical and financial possessions, creating a virtual will for your Google account will make matters infinitely easier for your loved ones if and when you ever develop a mild case of death.
For company-managed Google Workspace accounts, someone at your organization would be able to take control of your account in the event that you were no longer able to access it. But with an individual Google account, no such system for passing along access exists.
Google has a simple system in place to manage this: Open up the Inactive Account Manager, and you’ll find tools for determining exactly what should happen if your account ever becomes inactive for a certain period of time. You can specify the number of months that must go by without any sign of your presence, along with the email addresses and phone numbers Google should use to contact you for confirmation. And then, you can give Google the email addresses of any people you want to be notified once it’s clear that you’re no longer available.
From there, you can specify exactly what types of information your chosen contacts will be able to access. You’ll even be able to leave a message for those people, if you want, and optionally create a broad autoreply that’ll be sent to anyone who emails you once your inactive period has begun (creepy!).
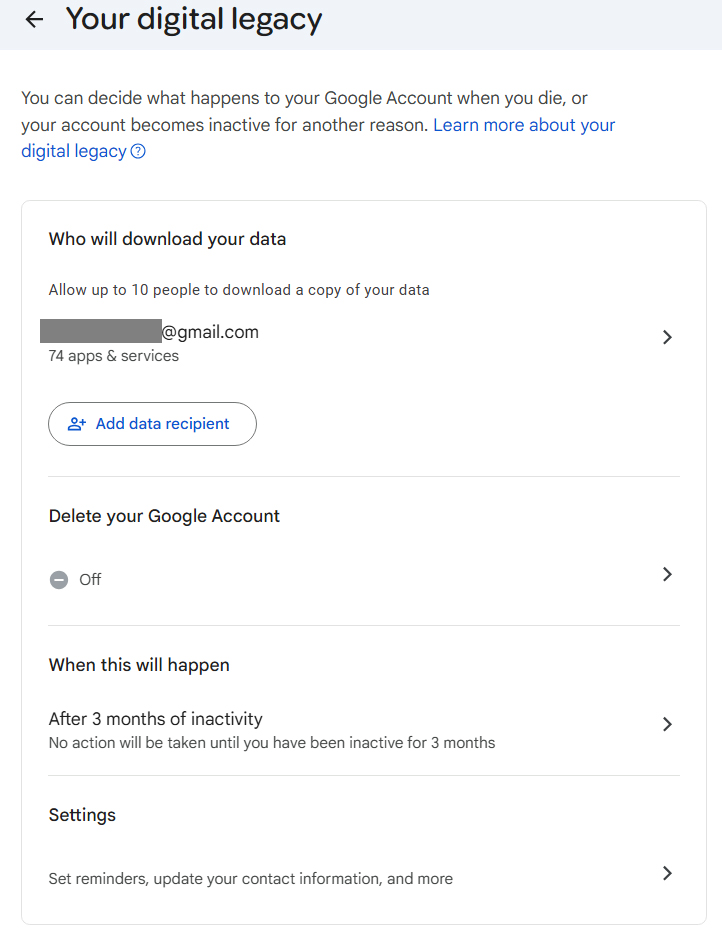
Google’s Inactive Account Manager is like a virtual estate planning tool for all of your account-associated data.
JR Raphael / Foundry
Even if you’ve gone through this process before, it’s worth going back in and revisiting your preferences occasionally to confirm the info is all still complete and accurate — not only in the specific contacts you have set to be notified but also in what specific areas of your account those people will be able to access, if this situation ever actually arises.
For that latter piece of the puzzle, be sure to click the email address of each person you have listed, then click the “Edit apps & services” option on the screen that comes up next. That’ll show you a list of account-related areas — everything from Contacts and Calendar to Google Chat, Google Photos, and even your location history (if you’re using a device that contributes to such a collection) — and let you both see which areas are currently selected and add or remove any areas you want from the list.
Virtually every time I’ve ever looked at that, I’ve found a handful of newer account-related areas weren’t selected to be shared — presumably because they didn’t exist when I had last reviewed the options. I had to manually check them all to be sure they’d be included in any post-consciousness account sharing.
Part IV: Turn your protection up to the max
Step 11: Think about Google’s Advanced Protection Program
Last but not least is a step that won’t be right for everyone but could be hugely consequential for certain types of Google users. For anyone at a higher risk of a targeted attack, Google offers an elevated form of account security called the Advanced Protection Program.
The program is described as being appropriate for business leaders, IT admins, activists, journalists, and anyone else who’s in the public eye and likely to be sought out by someone looking to do damage. It puts a series of heavy-duty restrictions on your Google account to make it especially difficult for anyone else to gain access — but as a result, it also makes things a bit more difficult for you.
The core part of the Advanced Protection Program is a requirement to have a physical security key the first time you sign into your account on any new device. That means in addition to your password, you’ll need that specific form of two-factor authentication — either an approved key built into your phone or a standalone dongle — in order to access your email, documents, or any other area of your Google account.
As part of the added security, you also won’t be able to connect most third-party apps to your Google account — including those that require access to your Gmail or Google Drive in order to operate. That could create some challenges (such as signing into an Android TV device, curiously enough) and require some compromises (such as no longer being able to use most third-party email clients with Gmail). And if you ever can’t get into your account for any reason, you’ll have to go through an extra-involved, multiday recovery process in order to restore access. You can read more about what the Advanced Protection Program is like to live with in this thoughtful overview.
Ultimately, only you can decide if the added inconveniences are worth the extra assurance. If you want the utmost in security for your Google account, though — and particularly if you’re someone who’s at a higher-than-average risk of being targeted — it’s something well worth considering.
If you do want to make the leap and add this extra layer of intense security onto your Google account, head over to Google’s Advanced Protection Program website to get started. With a personal account, you’ll be able to get yourself up and running in a matter of minutes. With an account that’s part of a paid company Workspace plan, your plan administrator will have to enable Advanced Protection for the organization before you’re able to do it. Once you start the enrollment process, you’ll see pretty quickly if it’s already available for your account or not — and if not, you can contact your company admin to ask about the possibility of allowing it.
And with that, give yourself a pat on the back: Now that these 11 steps are behind you, your Google account security is officially in tiptop shape — and you shouldn’t have to devote an ounce of thought to this area again anytime soon.
Just set yourself a reminder to revisit this page and review the steps within it once a year for good measure. (I’ll continue to update and expand the specific instructions as needed over time.) Do the same with security smarts in other areas — like your Android security settings, if you’re using an Android device of any sort — and then rest easy knowing your most important digital info is as secure as it can possibly be.
This article was originally published in February 2020 and most recently updated in February 2026.